Siding Repair

The Benefits of Vinyl Siding

Whether you’re looking to increase your home’s value or just want a low-maintenance exterior, vinyl siding is a popular option. Learn more about the benefits, types, and costs of this versatile material.

Vinyl Siding

Vinyl Siding Richmond is engineered to withstand harsh weather conditions like high winds and extreme temperatures. It also comes with a variety of warranties that cover fading and cracking.

When you’re considering siding options for your home, durability should be at the top of your list. The siding protects your home from the elements, so it’s important that it can withstand the weather conditions in your area and stand up to the demands of daily life. While most manufacturers offer a lifetime limited warranty on their vinyl siding, you can further enhance your peace of mind with additional warranties that provide protection in case of damage or wear.

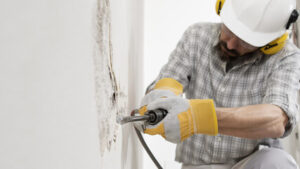
Regardless of the type or color of vinyl siding you select, it’s important that the installation is done correctly. If gaps, cracks, or dents allow water to get behind the panels, they can lead to mold, mildew, and other issues. Proper installation techniques include ensuring that a moisture barrier is put in place and nailing the siding every 16 inches to accommodate expansion and contraction. The trim around doors, windows, and other openings should also be nailed and caulked to prevent moisture from seeping into the surrounding structure.

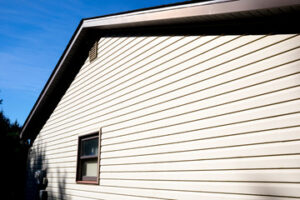
In addition to its durability, vinyl siding provides a variety of visual styles and textures to suit your home’s architecture and personal preferences. This flexibility can add value to your home and increase its marketability, especially if you choose neutral shades that will appeal to a broad range of buyers.

Vinyl siding is also a great option for energy efficiency. With a layer of foam insulation attached to the back of each panel, it can help reduce your heating and cooling bills by keeping your house warmer in winter and cooler in summer.

When choosing a contractor to install or replace your vinyl siding, look for one with experience working with the style and texture you’re looking for. Check out their reviews, ratings, and references, as well as their local work license, insurance, and manufacturer certification. Look for a contractor who is dedicated to customer service and stands by the quality of their work.

Compared to other exterior products, such as wood, vinyl can save you time and money on upkeep and maintenance. Unlike wood, vinyl resists rot and insect infestation. It’s also easy to hose down and requires no painting or staining.

Aesthetics

When paired with the right colors and textures, vinyl siding can offer homeowners a beautiful and functional aesthetic. Its wide range of options allows homeowners to create a distinctive exterior that complements their home’s architectural style. From traditional to modern, there is a vinyl siding color and texture that will fit any vision.

The color of vinyl siding is an important consideration for homeowners, as it has a significant impact on their home’s aesthetic, maintenance, and energy efficiency. Popular vinyl siding colors include white and neutral tones, which provide a clean and bright appearance, as well as bold and vibrant hues that allow homeowners to make a statement. When choosing a vinyl siding color, it’s important to consider how the shade will look under different lighting conditions and to ensure that it harmonizes with trim colors and the surrounding environment.

Aside from color, the texture of vinyl siding is also an important factor to consider. Some vinyl siding textures mimic the look of real wood, such as cedar shake or wood grain, providing a classic and rustic appearance. Other textures, such as vertical design and board & batten, can make a home appear taller and more stately.

In addition to color and texture, the material used for vinyl siding is another major factor that affects its aesthetic. Some vinyl siding materials are more durable than others, making them a better choice for homeowners who want to protect their homes from the elements. Some vinyl siding options are designed to withstand harsh weather conditions, including hail and wind.

In addition to enhancing a home’s beauty and value, vinyl siding is an affordable option that requires little maintenance. It is resistant to water, rot, insect damage, and fire, and it can be easily cleaned with soap and water. Its low upfront cost and longevity make it a great investment for homeowners. In addition, vinyl siding can be installed in a variety of ways, including horizontal and vertical. This versatility makes it a popular choice for both new and existing homes. Moreover, it can be painted to match other architectural features and trim colors, ensuring a seamless aesthetic.

Energy efficiency

Vinyl siding is available in a variety of colors and styles, giving homeowners the freedom to create their ideal aesthetic. This flexibility also helps increase resale value and attract a wider range of home buyers. Additionally, insulated vinyl siding provides greater energy efficiency and durability, making it an excellent choice for New Jersey homes.

When choosing a contractor for your vinyl siding installation, make sure they have experience working with this type of product. Ask for references and photos of previous projects to ensure they’re qualified. You should also ensure that they have a local work license and insurance, as well as being certified by a reputable manufacturer. These credentials ensure that they have the proper knowledge to install and repair this type of siding properly, as well as a warranty that covers their work should something go wrong during the project.

Unlike wood and metal studs, vinyl siding insulation does not conduct heat. This feature allows it to keep warm air from escaping the house in cold weather, as well as deflecting UV rays during hot temperatures. Additionally, the material is effective at reducing humidity levels in the home, which makes it easier to maintain a comfortable temperature without overusing the furnace.

In addition, insulated vinyl siding is designed to resist wind-driven damage and severe weather conditions. This is because it features a double-layer mounting hem and other wind-resistant technologies, including a sturdier trim piece around windows, doors, and other openings. Furthermore, the insulation is bonded to the vinyl for increased stability and durability.

Choosing the right color and style for your vinyl siding can greatly impact its performance. Light shades like white, grays, and blues will help reduce the amount of heat that is transferred through the walls. The lighter colors also reflect sunlight and UV rays, helping keep the home cool. Dark colors, on the other hand, absorb and retain heat more effectively.

If you’re interested in upgrading your home to a more energy efficient vinyl siding, contact DaBella today for a free estimate! We’ll help you find the perfect color and style to boost your home’s curb appeal and improve its energy efficiency.

Maintenance

While you spend the majority of your time inside your home, it’s important to keep up with its exterior. It’s where guests first get a look at your property, and it increases your home’s curb appeal and resale value. One of the most cost-effective ways to improve your home’s appearance is through vinyl siding.

Low Maintenance

The main reason many homeowners choose vinyl is because it requires minimal maintenance. Cleaning your vinyl siding can be as simple as using a soft brush and garden hose with mild detergent once or twice a year. Vinyl is also durable and will not crack, fade, or peel like natural materials such as wood can.

Another benefit of vinyl is that it resists rot and pests. This can save you the expense of costly wood repairs or replacement. However, it is important to perform a visual inspection of your vinyl siding at least once or twice per year for signs of moisture, rotting, or pests.

Vinyl can be damaged by repeated impact from lawnmowers and other heavy equipment, so it is best to keep these items several yards away. It may also melt if exposed to direct heat. It’s also a good idea to cover vinyl while completing any yard work such as weed killing or tree trimming.

If you do notice any discoloration of your vinyl siding, it’s a good idea to clean the area with household cleaners such as soap and water or a vinegar solution. Be sure to scrub the affected area, then rinse thoroughly. Avoid abrasive brushes and scrubbers, as these can damage the vinyl surface.

If you notice any signs of wear, it is a good idea to consult with your local vinyl manufacturer for guidance on replacing or repairing the damaged area. Often, these manufacturers will provide a warranty for new vinyl siding that will extend the life of your home’s exterior.

Stucco Repair

What Is Stucco?

Stucco Philadelphia is a durable and beautiful finishing material for masonry and concrete buildings. It performs best in climates that experience minimal moisture intrusion, freeze-thaw cycles and other weather related damage.

Stucco

Hand-modeled stucco is a thing of the past, but it has an honored place in the history of architectural styles. It allowed artists to mold relief sculptures and painters to create vibrant schemes.

Stucco is a cement-based siding that adds a textured finish to your walls. It can be applied to wood or masonry-based walls. It is a versatile material that can be used in many different styles, ranging from modern to traditional. It can also be painted in a variety of colors. Stucco is also resistant to fungus and bugs, making it an excellent choice for outdoor buildings.

It is important to note that stucco requires regular maintenance to prevent damage from weather, critters, and other natural hazards. A well-maintained exterior will also increase the resale value of your home. Keeping up with regular repair and maintenance, like sealing hairline cracks, will ensure that your stucco exterior lasts for years to come.

There are two different types of stucco: traditional and acrylic. Traditional stucco is made from a mix of cement, sand and water while acrylic stucco is made with plastic resin and fiberglass additives that give it its strength and durability. Both types of stucco can be colored to match your desired aesthetic, and you can choose between a smooth, raked or swirled finish.

In addition to being a beautiful and durable option, stucco is also an effective insulator. The thick layers of material provide a robust barrier against both heat and cold, helping to lower your energy bills.

In order to properly apply stucco, it is important to use a professional stucco contractor. Before beginning any project, the contractor should conduct a thorough examination of your home’s exterior. This will help them to determine any hidden quirks or peculiarities that may affect how the stucco is applied. It is also important to use the correct materials when applying stucco. If the wrong material is used, it can lead to cracking and moisture problems.

What is stucco made of?

Stucco is a cement-based material that adds a textured finish to walls. It is a popular choice for builders as it is durable, fire-resistant and offers a wide range of colors and textures. It is made from a mixture of Portland cement, sand and water. Modern stucco uses polymers and other chemicals to increase strength and flexibility. Stucco can be applied to concrete walls, brick or a wood frame. A wire mesh called lath is placed over the wall before the stucco mix is applied. This is to keep the wood from absorbing moisture which could cause damage to the structure. Typically, three coats of stucco are used, known as the 3-coat system. The first layer is the scratch coat, then the brown coat and finally the top coat.

When choosing a stucco color for your home, it’s best to speak with a professional. They will be able to help you determine what type of stucco will work best for your house and provide a variety of samples. It’s also a good idea to hire a professional to install or repair your stucco as they can ensure it is done correctly and up to code.

Stucco requires regular maintenance and inspections for cracks, discoloration and signs of moisture intrusion. If left unchecked, these problems can lead to a lack of visual appeal as well as expose your home to potential damage from moisture, insects and rodents. Keeping up with routine care and inspections can help prevent the need for costly repairs and extend the life of your stucco exterior. Stucco is energy-efficient, provides insulation for your home and has a unique design. Talk to an eXp real estate agent today about finding your dream home with a stucco exterior!

Where is stucco used?

Stucco is typically used on residential buildings, but it can also be used on commercial structures. It is popular in areas that are heavily influenced by traditional Spanish and Mexican architecture, like California, Arizona, Texas, New Mexico, and Florida. It can add a beautiful and unique design element to a building’s exterior, as well as provide long-term durability and fire resistance.

Stucco can be used to create a variety of different textures and designs. It can be painted to create a variety of colors and finishes, or left natural for a more rustic look. It can also be combined with other building materials to create a more unique style. For example, stucco can be used with brick or glass to create a modern and sleek design.

In addition to its durability and aesthetic appeal, stucco can also help to insulate a building and reduce energy costs. It is also relatively low maintenance, requiring only periodic inspections and occasional cleaning to keep it looking its best. However, it is important to note that stucco is not water-resistant and can be damaged by rain or snow.

If you are considering using stucco on your home, it is important to find a qualified and experienced contractor. They will be able to advise you on the type of stucco that is best for your building, as well as discuss any potential issues that may arise. They will also be able to recommend any additional measures that can be taken to protect your stucco from weather damage, such as installing rain gutters or adding a waterproof barrier.

When properly installed, stucco can be an attractive and durable option for your home or business. It is a great choice for those who want to add a touch of luxury and sophistication to their property.

How is stucco installed?

Stucco is a popular choice for exterior walls because of its durability, low maintenance requirements, and design versatility. It can also provide energy efficiency and help protect walls from moisture damage and mold growth if installed properly. However, there are some key considerations that must be taken into account when choosing this type of siding for your home or building.

When a homeowner chooses to have stucco applied to their home, they will need to have the proper framing and sheathing in place. This is important because if the framers don’t have this in place, the stucco can crack and become damaged. In addition, the sheathing must be able to withstand moisture, which is why it’s important to use water resistant sheathing.

After the sheathing is in place, the framers will need to install a strip of building paper over the entire wall surface. This strip should be long enough to cover the flashing tape and allow for a 6” overlap of the paper-backed lath that stucco applicators will put on. This is part of the weather resistive barrier or secondary drainage plane and helps prevent moisture from penetrating the wall sheathing and causing structural damage.

Once the sheathing and the building paper are in place, the stucco will be applied over the metal lath or welded wire mesh. The first coat is known as the scratch coat and consists of a mixture of cement and sand. This coat is physically scratched by a trowel to make it have a rough surface that helps the next layer of stucco adhere to it.

The brown coat is then added and must be allowed to dry completely before the final plaster is applied. This is the stucco that will determine the overall thickness of the plaster and can be either an acrylic or a cement-based mix.

What are the benefits of stucco?

Stucco is energy efficient, durable, and provides excellent insulation for your home. It also offers resistance to mold and rot and is easy to maintain. However, like any exterior facade, stucco requires periodic maintenance and a thorough inspection for cracks and signs of moisture intrusion.

The most obvious benefit of stucco is its timeless beauty. Many Winnipeg homeowners choose to have stucco added to their homes because it creates a more seamless and elegant look than traditional siding. Additionally, stucco is more durable than other types of siding and is not as prone to damage caused by moisture or wind.

Another benefit of stucco is its sound resistance. If you live close to a busy road or noisy neighbors, stucco can help reduce the noise levels coming from outside your house. This can give you a better night’s sleep and make your living space more comfortable.

When it comes to maintaining your stucco, regular washings with a power washer can keep the material clean and free of dirt and debris. Additionally, it’s important to make sure that sprinkler systems and landscaping/plants are not in direct contact with the stucco walls as this can cause the stucco to absorb water and potentially rot.

It’s important to hire a professional for your stucco project, as improper installation can lead to moisture and structural problems in the future. The contractor will inspect the current sheathing and insulation before adding any new materials and will ensure that the roof rakes and kick-out flashing are properly installed to protect your home from moisture damage. They will also ensure that your windows and doors have pan flashing at the sills and Z-flashing with end dams at the heads to prevent water from entering your house through these areas.

Home Improvement

Window Installation – Proper Preparation is Key to a Smooth, Durable Finish

Window Installation is a meticulous process that requires experience and precision. Proper preparation is key to a smooth, durable finish that will keep your home insulated and protected from water and outdoor elements.

Window Installation

Check the window opening to make sure it’s square and level, then frame the new window according to manufacturer instructions and industry best practices. Insulate the window and close it with a weather strip to prevent air leaks. Visit https://www.windowinstallationwaukesha.com/ to learn more.

When you install a new window, it is important to properly prepare the opening. This process will ensure that the window is installed correctly and sealed against moisture, air, and other outdoor elements. It will also help to prevent future problems such as rotting, water damage, and poor performance of the window.

The first step in preparation is to measure the rough opening of the wall where you want to install your new window. Be sure to measure at multiple points, and check that the measurements are accurate. If there is any significant difference, you may need to adjust the window size or choose a different window.

Next, you will need to remove any furniture, decorations, or other items from the area where the installers will be working. This will create a clear path for them and help to protect your belongings from dust, debris, or damage. You should also move any obstacles outside of the installation area, such as garden tools or furniture, and trim back any plants or bushes that could be in the way of the installation process.

Once the space is clear, you should cover any items that you don’t want covered in construction dust with drop cloths. It is also a good idea to cover your carpets and other flooring with tarps or sheets. This will keep them from getting dirty and help to preserve their longevity.

When the installation team arrives at your home, they will need to set up their work stations and begin the process of preparing the window opening. They will use a ladder to access the window sill and frame, and they will also need to remove any existing hardware from the window sashes or casing. This will include the sash weights and springs, as well as any other hardware that was used in previous windows.

It is a good idea to wait to make major improvements in your home, such as painting or changing flooring, until after the window has been installed. This will help to prevent damage and avoid any unnecessary delays in the project.

Measurement

When it comes to window replacement, precise measurements are essential. Even a small mismeasurement can throw off the installation and impact performance. It’s important to take the time to carefully prepare for measurement and ensure that you have a reliable tape measure, a level, and a notepad for recording your measurements. Before you start measuring, make sure the work area is clear and free of any obstructions that could skew your results. It’s also a good idea to clean the window area to provide better visibility and reduce the risk of error.

The first step in the measurement process is to determine the width of the existing window frame. This can be done by measuring across the inside surface of one jamb and across to the inside surface of the opposite jamb. Do this on the left, middle, and right sides of the window, using the smallest measurement to ensure that the new replacement windows will fit.

Next, you’ll need to determine the height of the window frame. This is a little more complicated, as you’ll need to measure across the sill (the bottom of the frame where the sash rests when closed) on the left, middle, and right sides. Again, use the smallest measurement to ensure that the new window will fit in the opening.

After that, you’ll need to determine the rough opening size of the window. This is the dimensions of the space within your wall, and it’s typically a half-inch larger than the actual window frame to account for adjustments and insulation.

This measurement is essential because it tells the window installers what kind of frame you have and how much room they have to work with. This helps them avoid wasting your hard-earned money on replacement windows that won’t fit in the opening or need to be trimmed to get in place. This is especially important if you’re replacing windows in an older home that may have settled and not be perfectly square. It’s also an excellent opportunity to communicate any special instructions for the install crew such as conserving your old windows or trimming, preserving your treatments, or avoiding a certain part of the yard that needs to be protected during installation.

Materials

Proper window framing is vital to the integrity of your home, preventing air leaks and contributing to energy efficiency. It’s important to use the right materials, follow modern standards and techniques for framing, and install windows with high insulating values to maximize your energy savings.

Before beginning any framing project, it’s essential to carefully measure the window opening to ensure accurate measurements and a smooth installation process. Using measuring tape and a carpenter’s square is a good way to make sure your measurements are precise. It’s also important to double-check your measurements to ensure they are accurate. If your measurements are off, the new window may not fit properly or could cause air leaks and reduced energy efficiency.

If you are replacing existing windows, it’s a good idea to test for lead paint in older homes to protect yourself and your family from potential health risks. Use a home lead testing kit or send a paint sample to a lab for testing. Additionally, wear protective gear and work in a well-ventilated area when removing old window trim and sills to avoid breathing in paint particles or lead dust.

When installing new windows, it’s important to follow the manufacturer’s instructions for your specific product. Different manufacturers have varying installation methods, so be sure to read the instructions thoroughly before beginning your project. If you have any questions, contact the manufacturer directly for assistance. Some manufacturers even offer online video installation resources that make it easier for visual learners to understand the process.

Once your windows are installed, you can install blinds or other window treatments to complete the look of your home. For example, if you have a valance over the window, mark where the first bracket will be on the wall with a pencil. Next, measure up 4 inches from each end of the valance and place a bracket at those marks. Finally, snap the valance onto the brackets to finish the job.

For a more dramatic renovation, consider full frame replacement windows. This method involves removing the entire window frame and sash, including any existing trim, to identify and resolve underlying issues such as moisture damage or poor insulation.

Installation

The window installation process is very complex and requires the use of specialised tools. However, with proper preparation and the right materials, even do-it-yourself enthusiasts can successfully install windows themselves. To start, it is important to clear the work area of any furniture or objects that may be in the way during the installation. This will protect the surfaces from damage and make the work easier for both you and the installers.

It is also a good idea to cover the furniture with sheets that will prevent dust and debris from ruining your upholstery. In addition, this will help you avoid expensive repairs to your furniture. You should also remove any outdoor objects that could be damaged during the window installation. This includes garden furniture, barbecues, and flowerpots. If you have children or pets, it is a good idea to keep them away from the work area, as they may be curious about the heavy materials and loud tools that are being used.

After the window is inserted, it should be checked for alignment and fastened to the wall. If necessary, the gap between the window and the frame should be insulated with fiberglass or low-expanding foam insulation. Caulking is then applied around the perimeter of the window to create a watertight seal. In some cases, a backer rod may be used to reduce the amount of caulk needed and improve the quality of the installation.

When the installation is complete, it is important to check that the windows are properly adjusted and the seals are correctly in place – this will ensure the smooth operation of the window sash and guarantee thermal and acoustic insulation. Furthermore, well-adjusted windows and front doors are better insulated and provide greater resistance to moisture and condensation.

If you are planning to hire a contractor for the window installation, be sure to discuss their pricing policy in advance. Some contractors will charge extra if they have to ask for your physical help lifting large or heavy windows into place, so you should clarify this matter in advance. It is also a good idea to find out how long the project will take, so that you can plan your day and make arrangements for your children and pets.

Home Services

What Is a Septic Tank?

From your toilets, showers, bathtub and sinks, wastewater runs into a main sewer line that slopes to your septic tank.

Solid wastes sink to the bottom of your septic tank, becoming a layer known as sludge. Fats, oils and greases float on top of the wastewater, becoming a layer called scum. Contact Septic Tank Armadale now!

A septic tank is an underground watertight container made of fiber glass, plastic or concrete. It is used in homes and cottages that are not connected to a municipal sewer system.

Every time you flush a toilet or wash clothes, wastewater enters your home through the sewer line and flows into your septic tank. From there it separates into three general components — solids or “sludge”, floatables (such as fats and oils) and a zone of relatively clear water. Microorganisms in your septic tank perform the first treatment by breaking down these components into a liquid form. The liquid then flows to the drain field area.

All septic tanks have an inlet baffle and an outlet baffle. The inlet baffle keeps sludge from entering the absorption field, which could clog and decrease the efficiency of your septic system. The outlet baffle prevents sludge from leaving the tank, which could clog the pipes leading to your absorption field.

In the drain field area, an aerobic bacteria system breaks down any remaining contaminants in the wastewater. This process lowers concentrations of organic matter, suspended solids, pathogens and nutrients like phosphorus and nitrogen. The treated wastewater then percolates through a layer of gravel and into the native soil. From there, it drains into a stream, river or lake.

If you have a septic tank, it’s important to keep an eye on your septic system and make sure it is working correctly. If you notice a foul smell, slow drainage or backflow from your sinks or toilets, it may be time to have your septic tank inspected. Also, be sure to use septic-safe products, such as biodegradable toilet paper and cleaning products. And don’t build anything over the drainfield, which can cause it to compact and block the flow of wastewater into the soil. This can cause sewage to back up into your home and create a health hazard. It’s also a good idea to have your septic tank pumped every one to four weeks. Having it pumped regularly helps keep your septic system healthy and reduces the need for repairs.

Installation

If you have recently purchased a property with an off-mains septic tank, or are looking to install one for your new home, it is crucial to work with a reputable installation company. This will ensure that your septic system is properly placed and correctly installed, and complies with all local regulations. Wrong installation is the root cause of most off-mains septic tank problems, and can lead to expensive repair bills down the road.

During the planning stage, your installation team will work with you to determine the best type of septic system for your household and land, as well as how large the tank should be. They will also consider factors such as your soil type, the slope of your land, and any nearby trees that could affect the drain field. They will also make sure to place the tank within a safe distance from your house and any other buildings, and take into account how close it is to any bodies of water such as lakes and rivers.

Once the septic tank is in place, it must be filled with water and inspected to be sure that it is leak-free. Once the tank is tested and approved, it can be backfilled with sand, gravel, or concrete. It is recommended to follow the manufacturer’s instructions for backfilling, as each type of material may require different methods.

The next step is to install the pipes between the septic tank and your drainage field, which is commonly known as the leach field. It is important to ensure that the drainage field is sized appropriately, as too small a leach field can result in a clogged or overflowing drainfield. Too large a drainfield can cause the liquid sewage to seep into the surrounding groundwater, which is harmful to the environment.

Your septic system will have a vent that allows the gasses to escape, which is essential to the proper function of the system. If you notice any unusual odors in your home or yard, it could indicate that the ventilation pipe is clogged and allowing sewage to leak out of the tank.

Maintenance

The bacteria in your septic tank produce gases as they break down the waste. These gases must be released to prevent a build-up of pressure that could stop or reverse the flow of wastewater. The gases are released through a vent in the septic tank lid. This vent is usually shaped like a mushroom and can be fitted with a charcoal filter to reduce odors.

A septic system’s soil absorption field is a series of perforated pipes in gravel trenches that allow liquid waste to seep out into the ground. The wastewater is then further filtered by the soil and grass above it. When the solids in your septic tank are too dense, they can flow to the drainfield and clog it. Over time, the drainfield will fail and sewage will overflow to the ground surface, exposing humans and animals to disease-causing organisms.

To keep your septic system in good working order, have it regularly inspected by a licensed inspector. Inspectors look for a variety of issues, including pipe integrity and proper ventilation. They also check for leaking and clogging, which can be difficult to spot without an inside view of the septic tank.

Septic tanks are a large investment, and it’s important to maintain them properly to avoid costly repairs. Have your septic tank pumped regularly, and have your garbage disposal checked for a leaky pipe that could be sending food scraps to the septic tank. It’s best to have the septic tank pumped through the central manhole instead of through the baffle inspection ports, as pumping the tank directly through the baffles can damage them.

When you have your septic tank pumped, ask the pumper to help you locate the absorption field. Draw a diagram or map of the location and mark it with easy-to-reach landmarks such as steps, fence posts, and corner points of your home. Keep this sketch with your septic tank records. Plant only grass or shallow-rooted plants over the absorption field to protect it from deep roots that could pierce the pipes and cause failure.

Be wary of products that claim to speed up the breakdown process or add extra bacteria. These chemicals can upset the delicate balance of microorganisms in your septic tank, and they can clog up your entire system.

Repairs

Because septic systems are underground, they often go unnoticed until something goes wrong. A septic tank that is full of waste or a broken component can result in sewage backing up into drains or even entering the home. In the worst case scenario, a septic system that is not maintained can cause serious health issues for you and your family.

Septic tanks need to be pumped regularly. The amount of water you use and what you put down your drains can impact how often your septic system needs to be pumped. If your septic tank is not pumped, it can overflow and contaminate your soil with disease-causing bacteria.

If you notice that your septic tank is leaking, there could be a problem with the seal or lid. A professional can inspect your septic tank and determine the best way to repair it.

Your septic tank should have an outlet filter that helps keep solids from exiting the tank and clogging up your drain field. If your septic tank does not have an outlet filter or your current one is damaged, contact Hapchuk, Inc to have a new one installed.

Another sign that your septic tank is in need of repair is if it has strong odors coming from your drains and yard. These smelly odors are caused by a buildup of anaerobic bacteria that digests organic materials in your drains and toilets. If the smells are severe, it is likely that your septic tank has a clog and that the anaerobic bacteria are no longer working properly.

Your septic system should have a ventilation pipe that carries away septic system gases. These gases consist of carbon dioxide, methane and nitrous oxide. If the ventilation pipe is clogged, this can lead to a toxic buildup of these gases in your home and yard. The clogged vent should be cleaned by a professional.

A healthy septic system will also have a drainfield to further filter wastewater and septic system waste before it enters groundwater. The drainfield is a shallow area of uncovered soil near the septic tank that filters wastewater through rocks, dirt and sand to remove impurities naturally. When a septic tank fails to pump out regularly, the sludge and scum layers can grow so thick that they block the drainfield, causing it to fail.